CHARGING
General
Always refer to the Turbo bike and/or charger manual for detailed information about charging. Here are some key points:
Charger
- Only use original and compatible chargers with Specialized e-bikes
- Do not use the charger with any other bicycle or any other charger with Specialized e-bikes, even if it fits
- Inspect the charger before every use for possible damage to the charger itself, the cable or the charging plug. Never use a charger which you suspect is damaged or know is broken
Charging
- Turn off the bike, unplug the charger from the charge port, remove any Range Extender batteries and close the charge port before performing work of any kind, such as installation, maintenance, cleaning, repair and/or transportation
- Make sure the charging socket and plug are dry before connecting and charging the battery
- Do not move bike/cranks with the charger connected
- Do not leave RE cable disconnected and dangling at frame when moving bike around
- Never leave the RE cable unplugged and spin the bike backwards — a backwards-moving crank arm will likely jam the RE connector between crank and frame, causing damage to the connector or even the frame
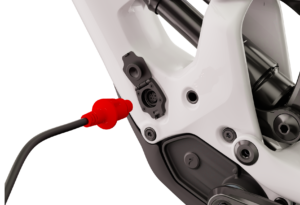

Charge / RE Port
- The charge / RE port is located above the non-drive-side crank arm
- Important: there are two experience-specific designs, MTB and Active / Road
- User should ensure port can dry out if water got somehow trapped inside
- MTN riders should ensure port is closed when not using a RE and after charging
- Socket is fixed to counterpart of main harness behind frame/in motor area by four small Torx screws
- Tip for replacement of socket: leave old socket attached with one screw, rotate it aside, fix new socket with one new screw and then take off old socket — this way you should be able to leave motor installed for replacement
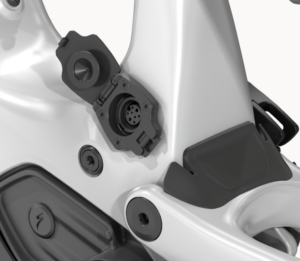
MTN Charge / RE port
- Stays open by default; reason: mtn. specific construction with higher sealing rate, needs to be left open to dry out
- Should stay open after wet rides to dry out
- Needs to be closed when RE / charger is not connected
- Sealing cup made of TPE (Thermoplastic Elastomer), hardness shore A50
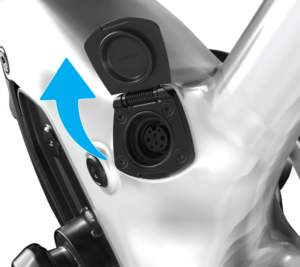
Active / Road SL charge / RE port
- Closes automatically (spring-loaded)
- Sufficient sealing for these bikes
- Can be kept open, if water has ingressed (e.g. wedge non-metallic piece between lid and socket)
- Sealing o-ring made of NBR (Nitrile Butadiene Rubber
Usage Tips
How to avoid RE cable damage
This pattern of damage happens when the RE cable is left dangling and the crank is rotated backwards forcefully or if the bike is ridden with a RE cable not connected to the port.
- RE cable needs to be replaced (other cosmetic damage possible)
- Not covered by warranty
- Always connect the RE cable at both ends or fully remove it from the RE when not in use
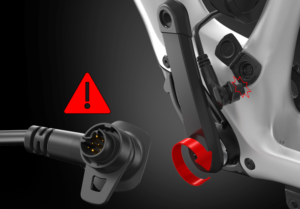
How to avoid charger plug damage
The charger connector can be damaged when the charge cable is plugged in and the crank is rotated backwards forcefully.
- Charger needs to be replaced (main harness/charge port is designed so that it very likely won’t break)
- Not covered by warranty
- Do not move bike/cranks with the charger connected
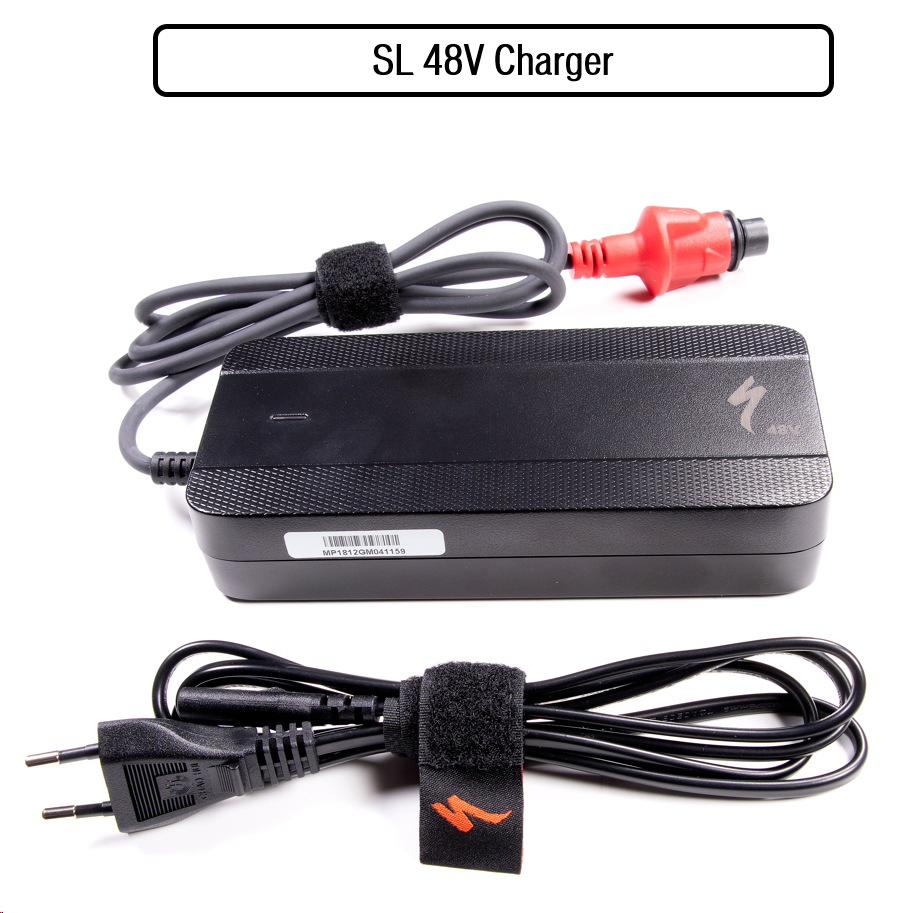
Charger (SBC-C06)
- Custom SL charger (dedicated connector and 48V)
- Specialized charger rule: if the plug fits, the charger is compatible
- Red plug serves as visual reminder that charger is connected (to be avoided: turning crank with charger plugged, can cause damage when crank hits connector with too much force; by design, charger socket should be damaged and not main harness or charge port in frame)
- Output: 54.6V / 3.0 A (output/charge times vary depending on charged battery, see table below)
- Charger housing dimensions
- Length: 170mm
- Width: 80mm
- Height: 35mm
- IP64 protection rating for connector
- Weight incl. cabling: approx. 780 g
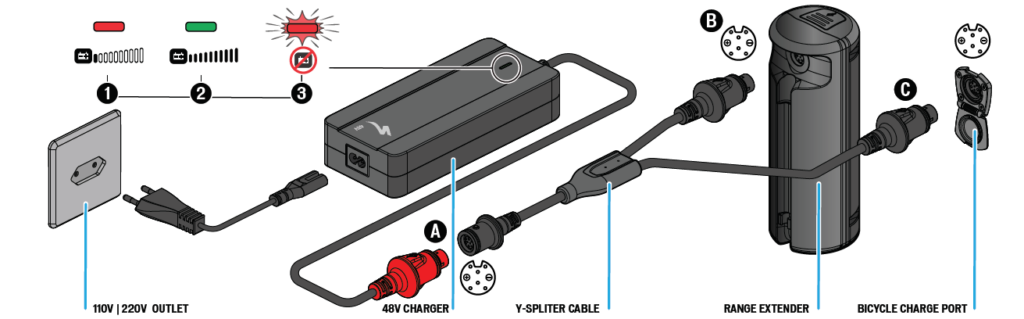
Charging options
- Use the standard charger to charge single batteries (note that it takes 4-5 seconds for charger to initiate charging process)
- Use standard charger in combination with the Turbo SL Y Charger Cable (98920-5660) to charge one RE and one internal battery simultaneously (see details below)
Y Charger Cable (optional)
- Optional aftermarket item (98920-5660)
- Use standard charger in combination with the Y-charging-cable to charge one RE and one internal battery simultaneously (no other battery combination works with Y-cable)
- Parallel charging is the non-changeable default when both batteries are connected by Y-charging-cable
- In order to initiate charging, both ends of the Y-cable need to be connected; however, the state of charge in the two batteries may deviate to allow charging
- IP64 protection rating for connectors
- It takes about 7 seconds for charger with two batteries to start charging
- Y-charge-cable cannot be used for discharging/riding
- Y-charge-cable cannot be daisy-chained (multiple serial connections are not possible/allowed)
- Both batteries need to be on the same voltage level to be charged simultaneously; example: if the RE is at soc 20% and the internal battery at soc 50%, the RE will be charged first till the voltage level is on par with the internal battery — then both batteries are charged in parallel
- TCU: both bar stacks (green and blue) indicate charging, even if temporarily only one battery is charged to equalize voltage levels; this assures rider that charging both batteries has started (it could be that rider checks charge progress in MC App and wonders why only one battery has an increased soc after time xy — this is normal and follows the logic describe above)

Charge Times & Cycles
Charge times vary depending on connected battery type and if Y-cable is used or not.
Charge cycles are counted as full cycles, which means the BMS in the batteries adds upp part cycles till one full charge cycle can be counted (example: if 160Wh are charged into a 320Wh battery, 1/2 charge cycle is counted).
Charging Setup | 3% — >100% | Stops charging (charger LED turns green & bike turns off) | Charging Current | Notes |
|---|---|---|---|---|
| RE on charger | 3h 20 min | 3h 25 min | 1.0 +/- 0.2A* | Single charging is the quickest method, if you have two chargers to |
| Internal battery on charger | 2h 35 min | 2h 55 min | 2.5 +/- 0.3A | |
| Internal battery + RE with Y-cable on charger | 3h 20 min | 3h 35min | 3.0+/-0.3A (total) = 1.0+/-0.1A (RE) + 2.0+/-0.2A (Int.) | If you have one charger and the Y-charge cable, parallel charging is the quickest. |
*Note: Due to a lower charging current, charging the RE alone takes longer than charging the internal battery and as long as charging RE + internal battery through Y-cable. The reason for slower charge times is to maintain battery health for riders (higher currents would stress the cells and decrease health quicker).