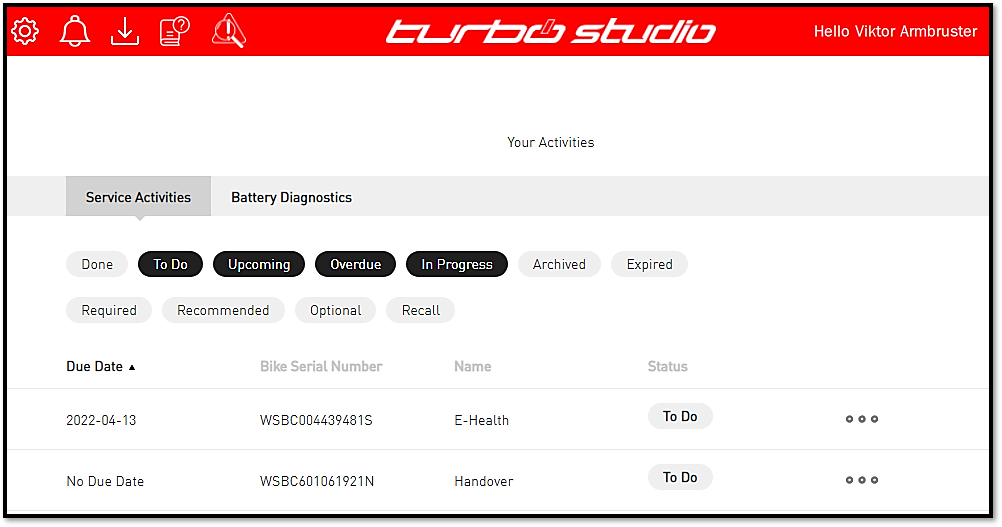
General Procedure
- The battery diagnostics procedure works within Turbo Studio and does not require the use of the standalone diagnostics program any longer.
- The displays (TCU / MasterMind TCU / MasterMind TCD / TCD-w) do not support battery diagnostic.
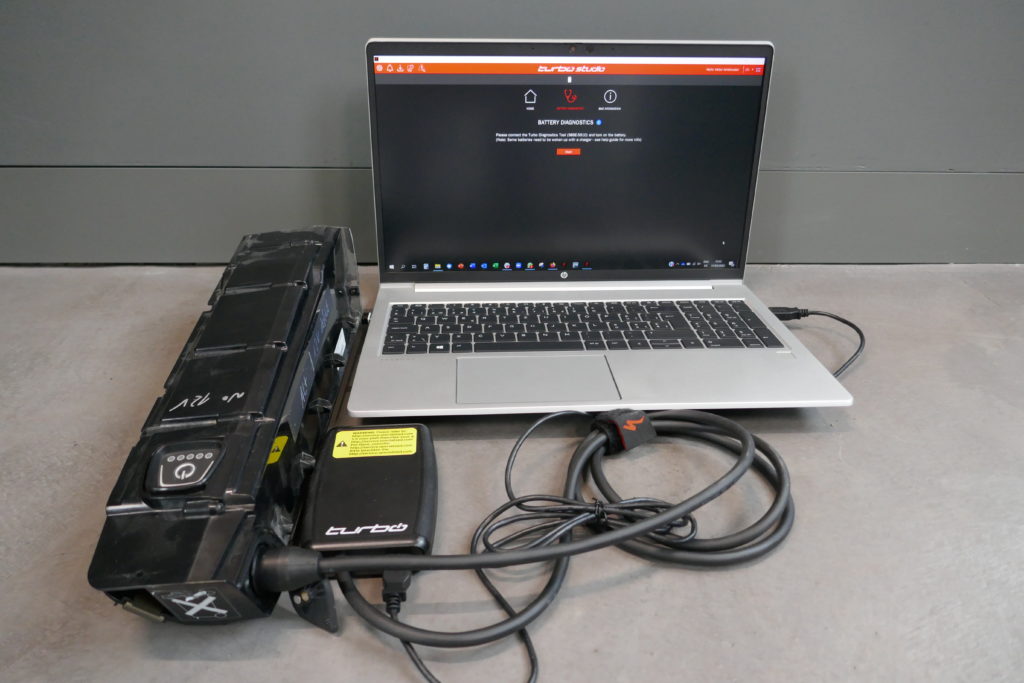
- To diagnose the battery, you need to connect directly to the battery, using the Specialized Diagnostic Tool (989E-5610). For SL batteries, you also need the diagnostics adapter (S216800010).
- For batteries without a power button, make sure that the battery management system is active: connect a powered charger to the battery for a few seconds and remove it again.
Connection Methods
Different Turbo bike types require different connection methods.
Levo 4
Both internal batteries and Range Extender batteries are diagnosed as shown. We recommend removing the internal battery for diagnostics.
A Diagnostics Tool (989E-5610) and the battery adaptor (S256800001) are needed to diagnose batteries.
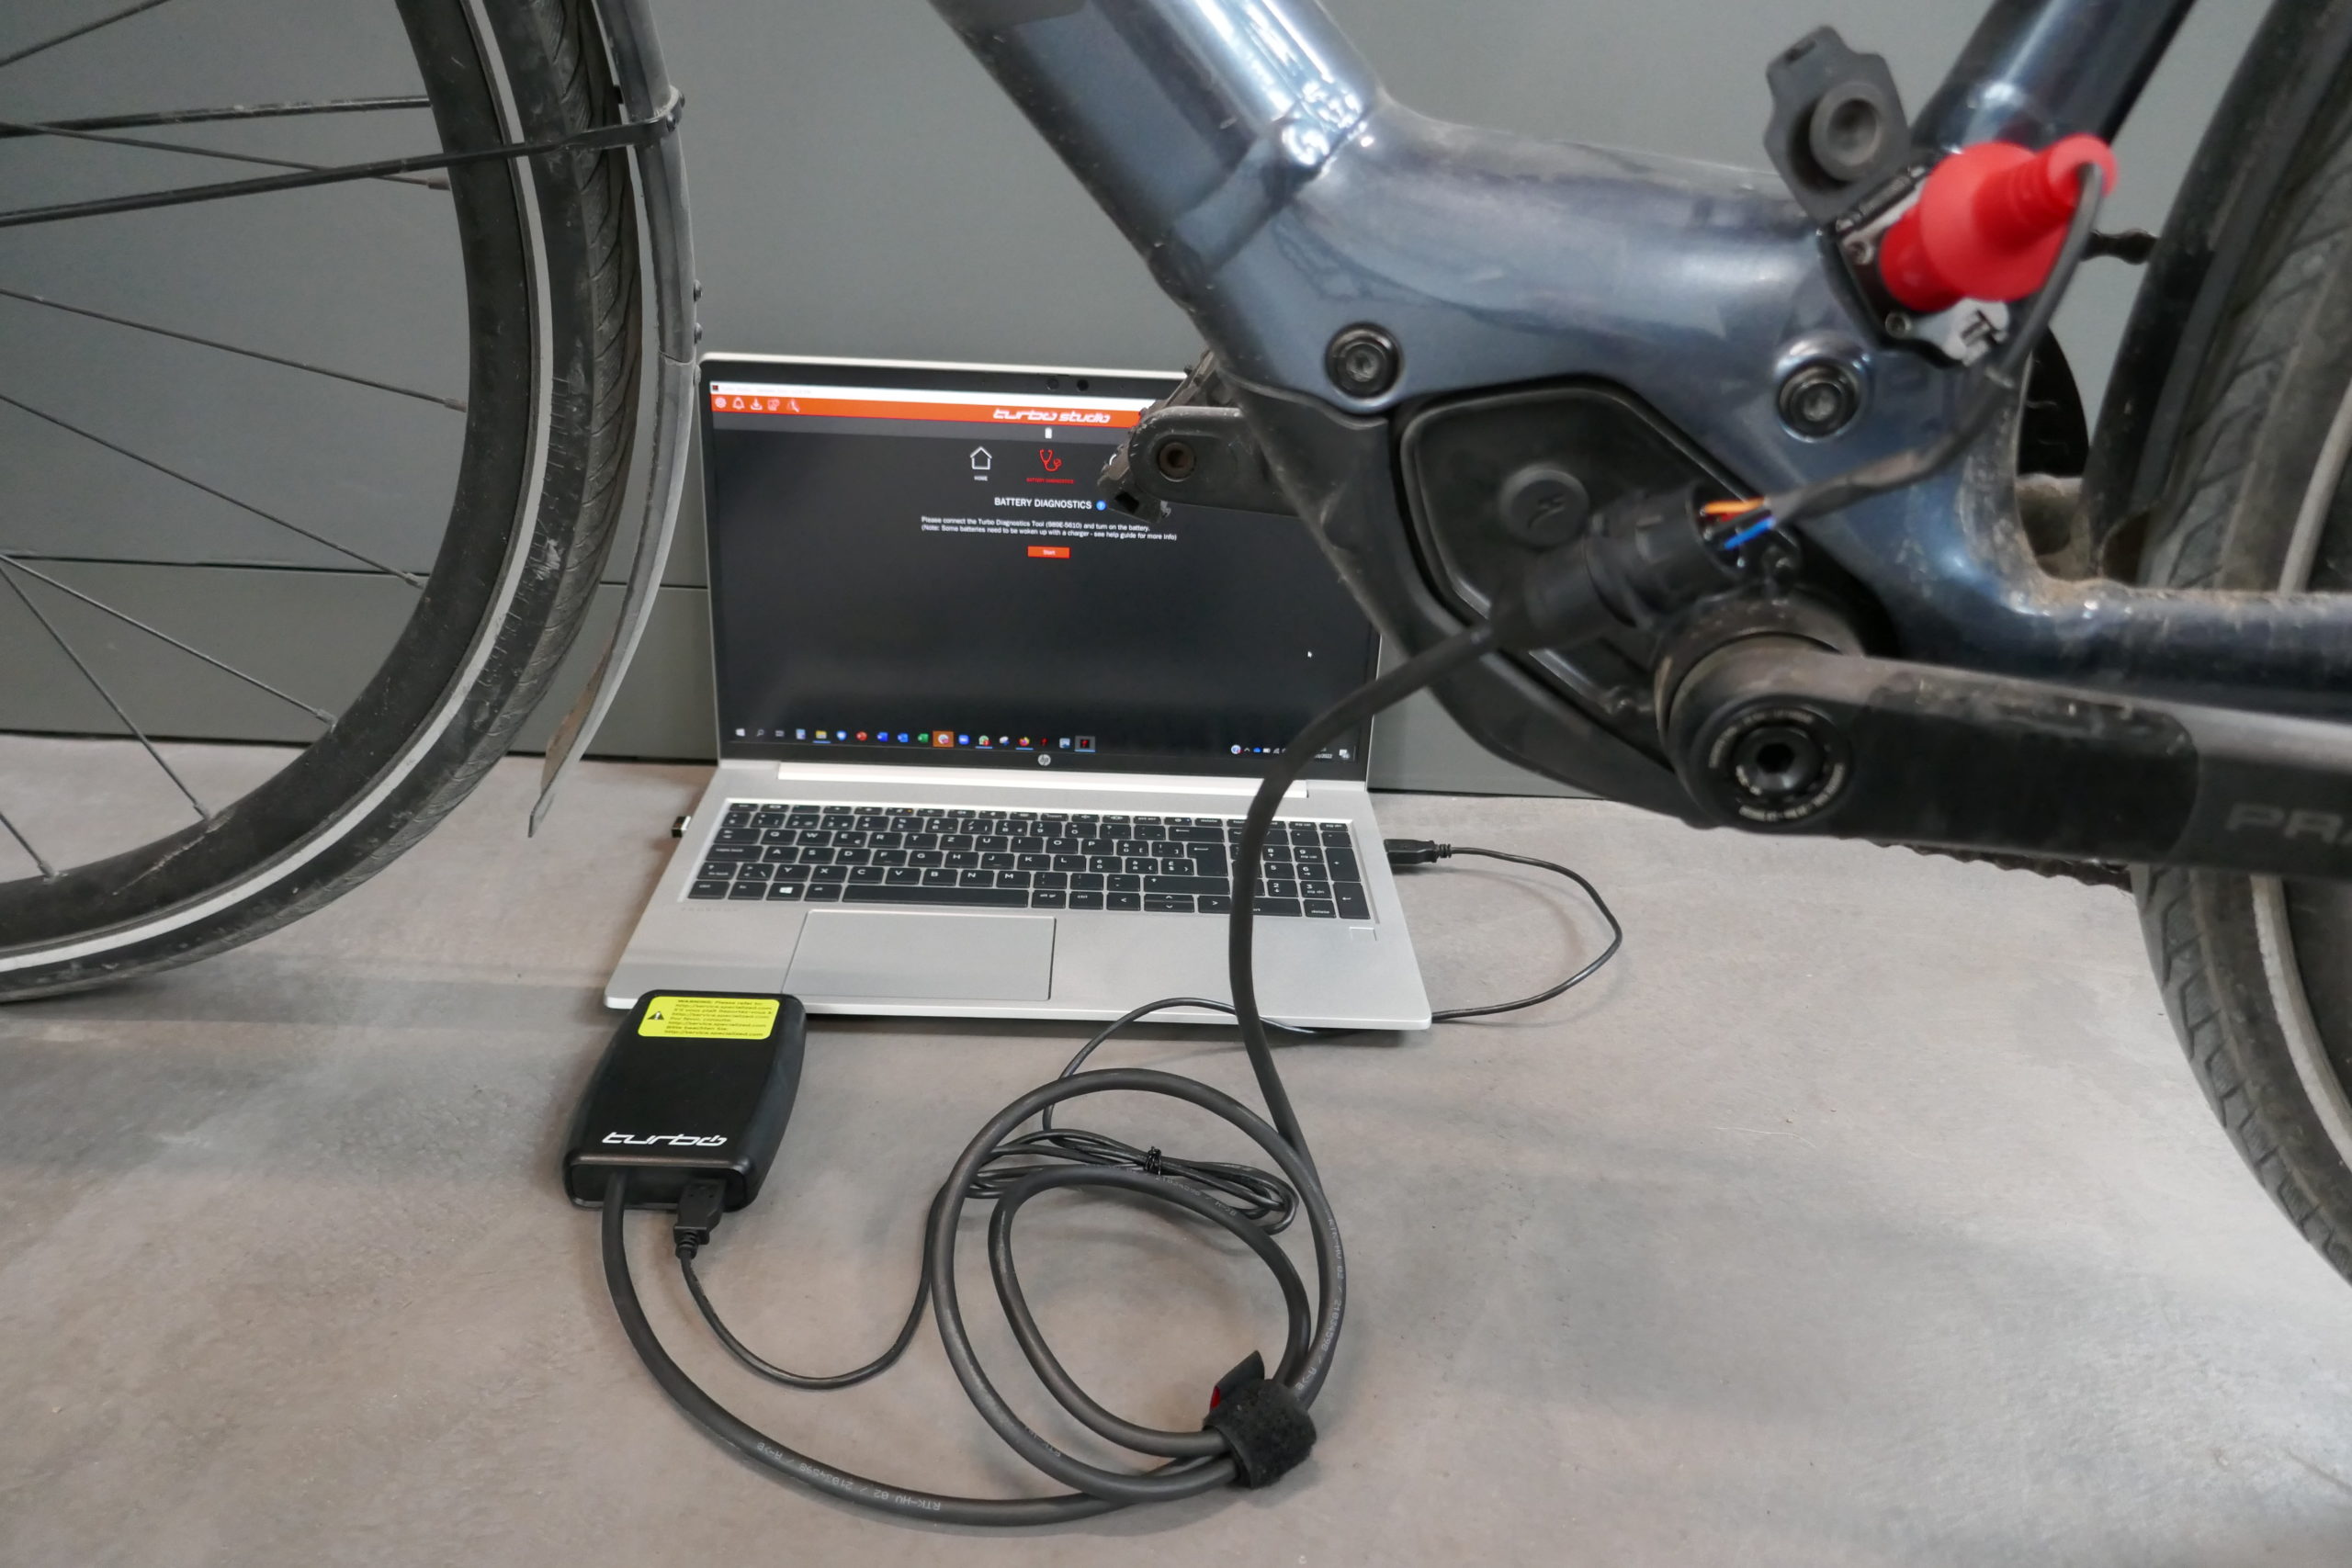
Levo / Kenevo Gen 2/3
Battery can remained installed for diagnostics and connect directly to the Specialized Diagnostics Tool (989E-5610) at the Rosenberger connector. However, we recommend removing the battery for additional physical inspection (housing, connectors/ports, attached hardware).
Levo / Kenevo Gen 1
Battery can remained installed for diagnostics and connect directly to the Specialized Diagnostics Tool (989E-5610) at the Rosenberger connector. However, we recommend removing the battery for additional physical inspection (housing, connectors/ports, attached hardware).
Vado / Como Gen2 & Tero
Battery can remained installed for diagnostics and connect directly to the Specialized Diagnostics Tool (989E-5610) at the Rosenberger connector. However, we recommend removing the battery for additional physical inspection (housing, connectors/ports, attached hardware).
Vado / Como Gen1
Battery can remained installed for diagnostics and connect directly to the Specialized Diagnostics Tool (989E-5610) at the Rosenberger connector. However, we recommend removing the battery for additional physical inspection (housing, connectors/ports, attached hardware).
All Turbo SL Bikes
For diagnosing internal batteries, the battery can be diagnosed through the external charging port, using the associated SL system diagnostics adapter (S216800010).
If damage is suspected, the internal battery can be removed and diagnosed by connecting the SL system diagnostics adapter directly to the main battery.
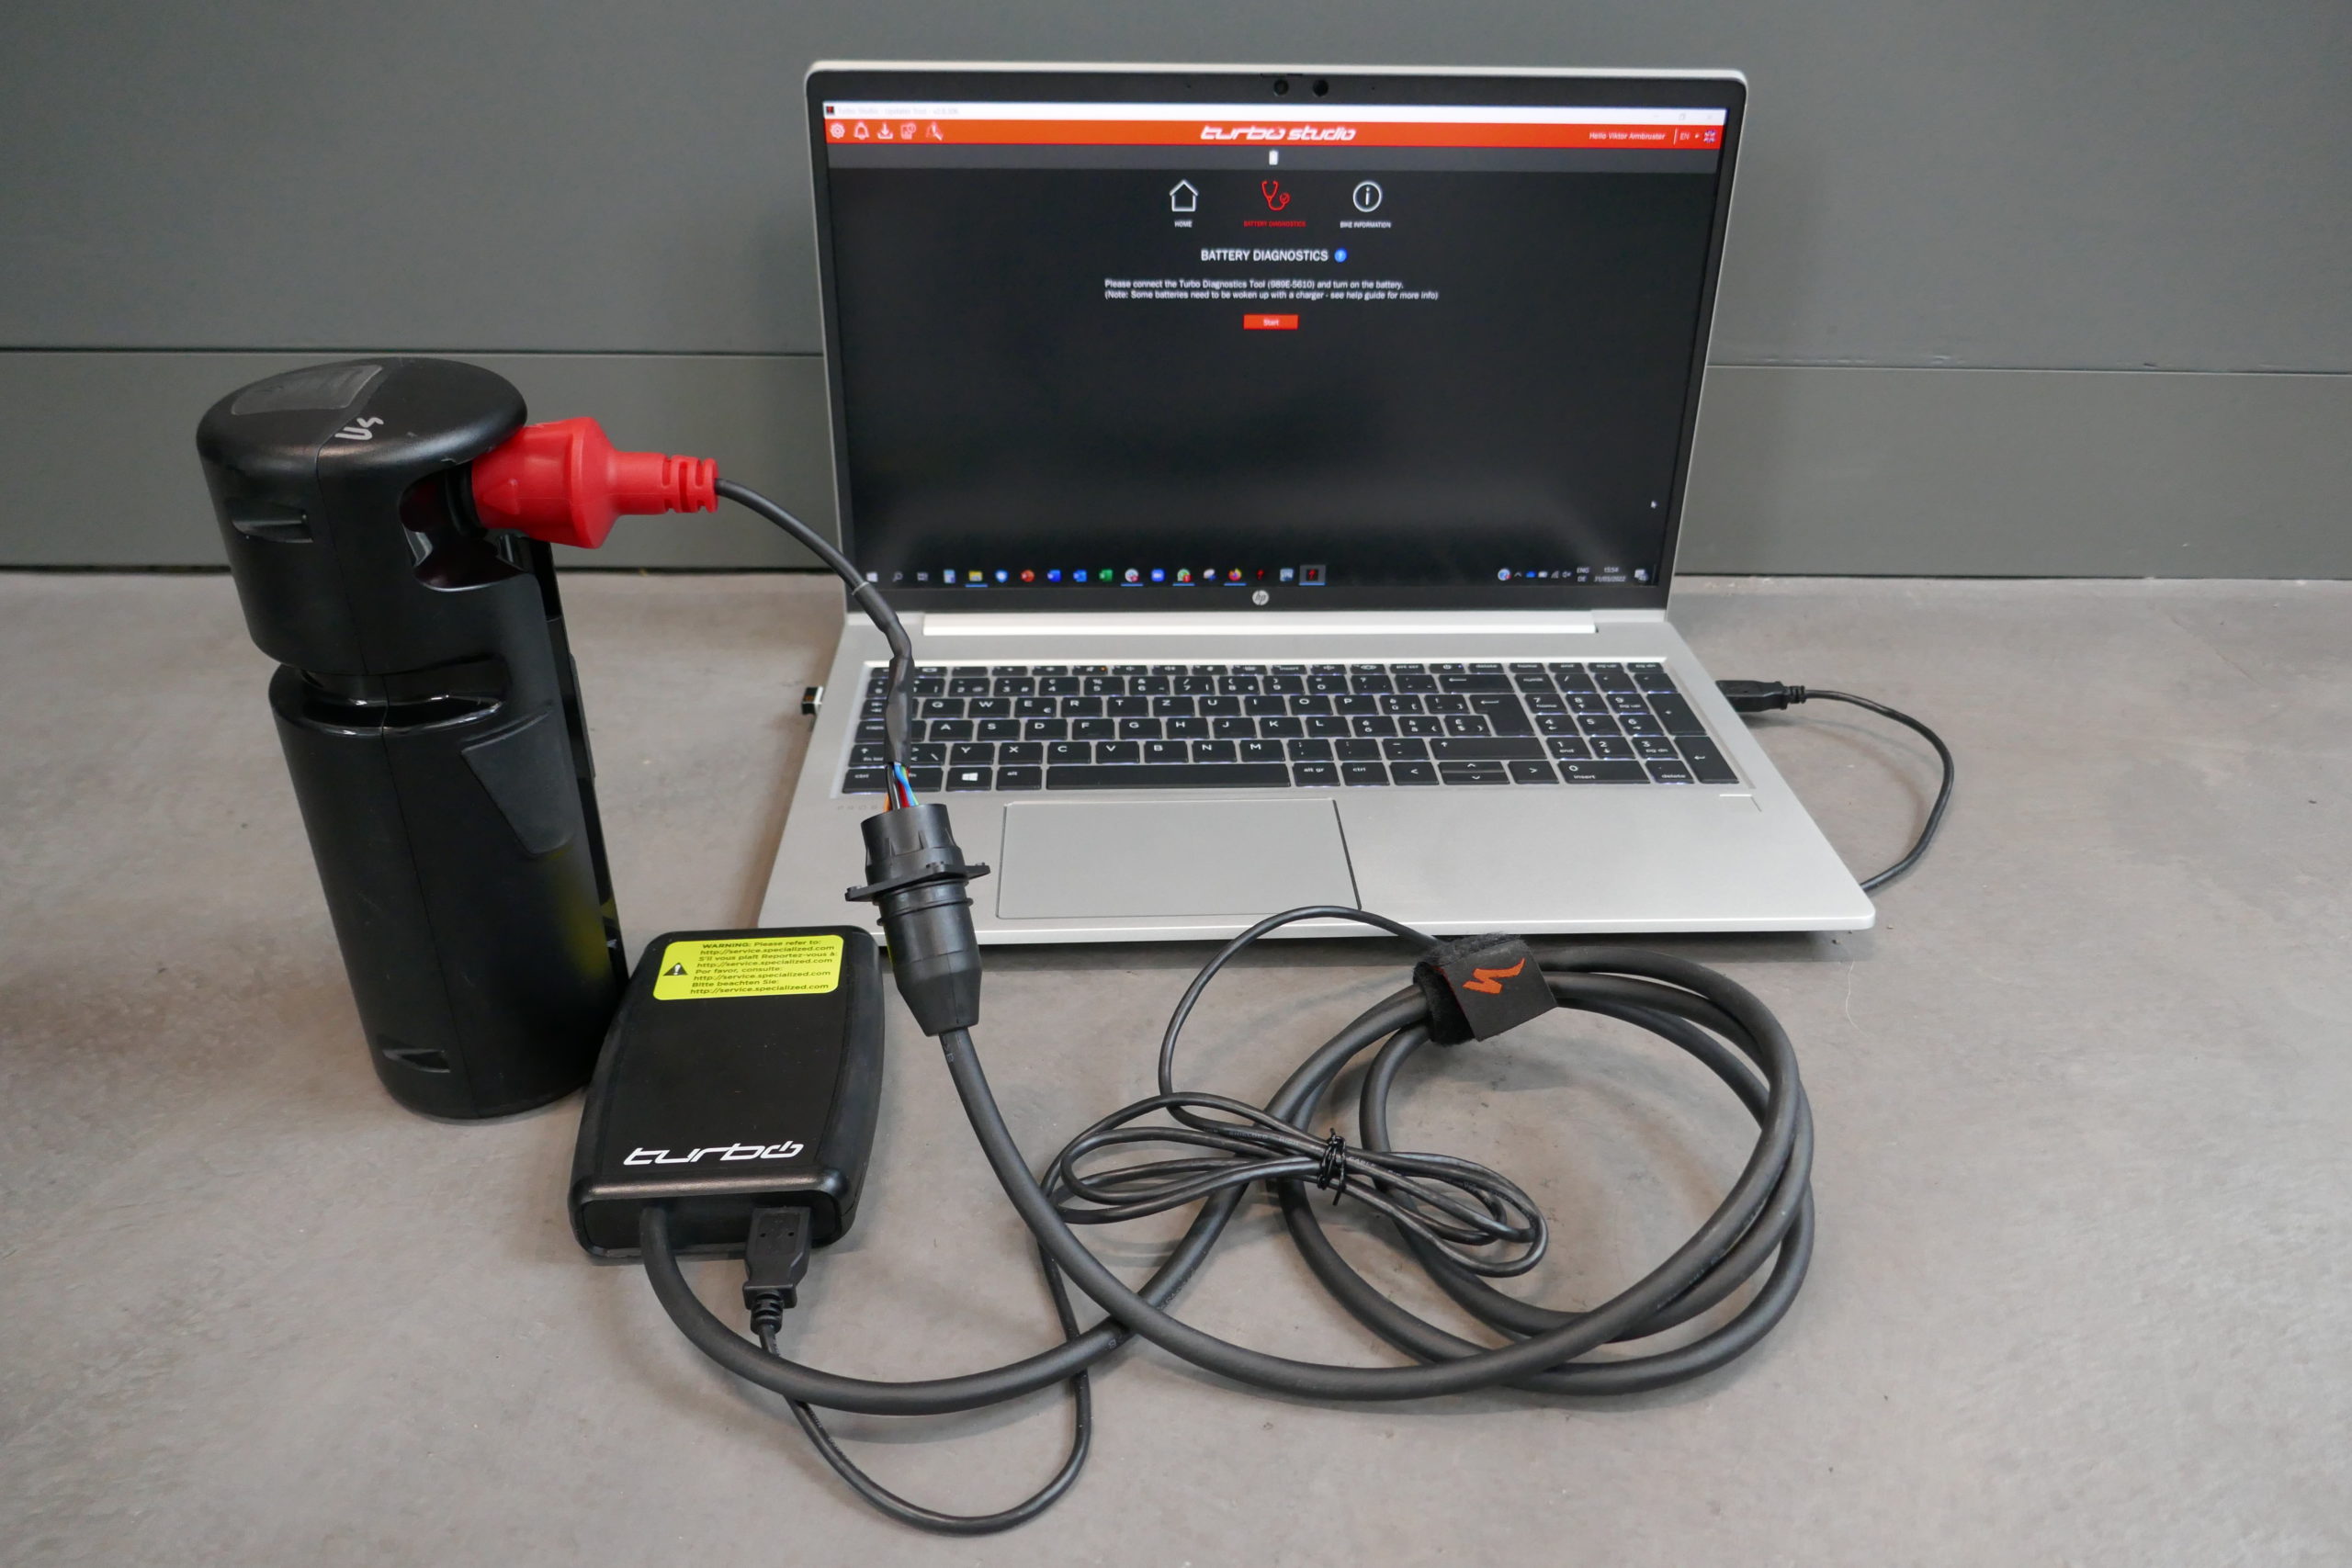
For diagnosing SL Range Extender batteries, these can be diagnosed by connecting the SL System diagnostics adapter (S216800010) and diagnostics tool directly to the battery.
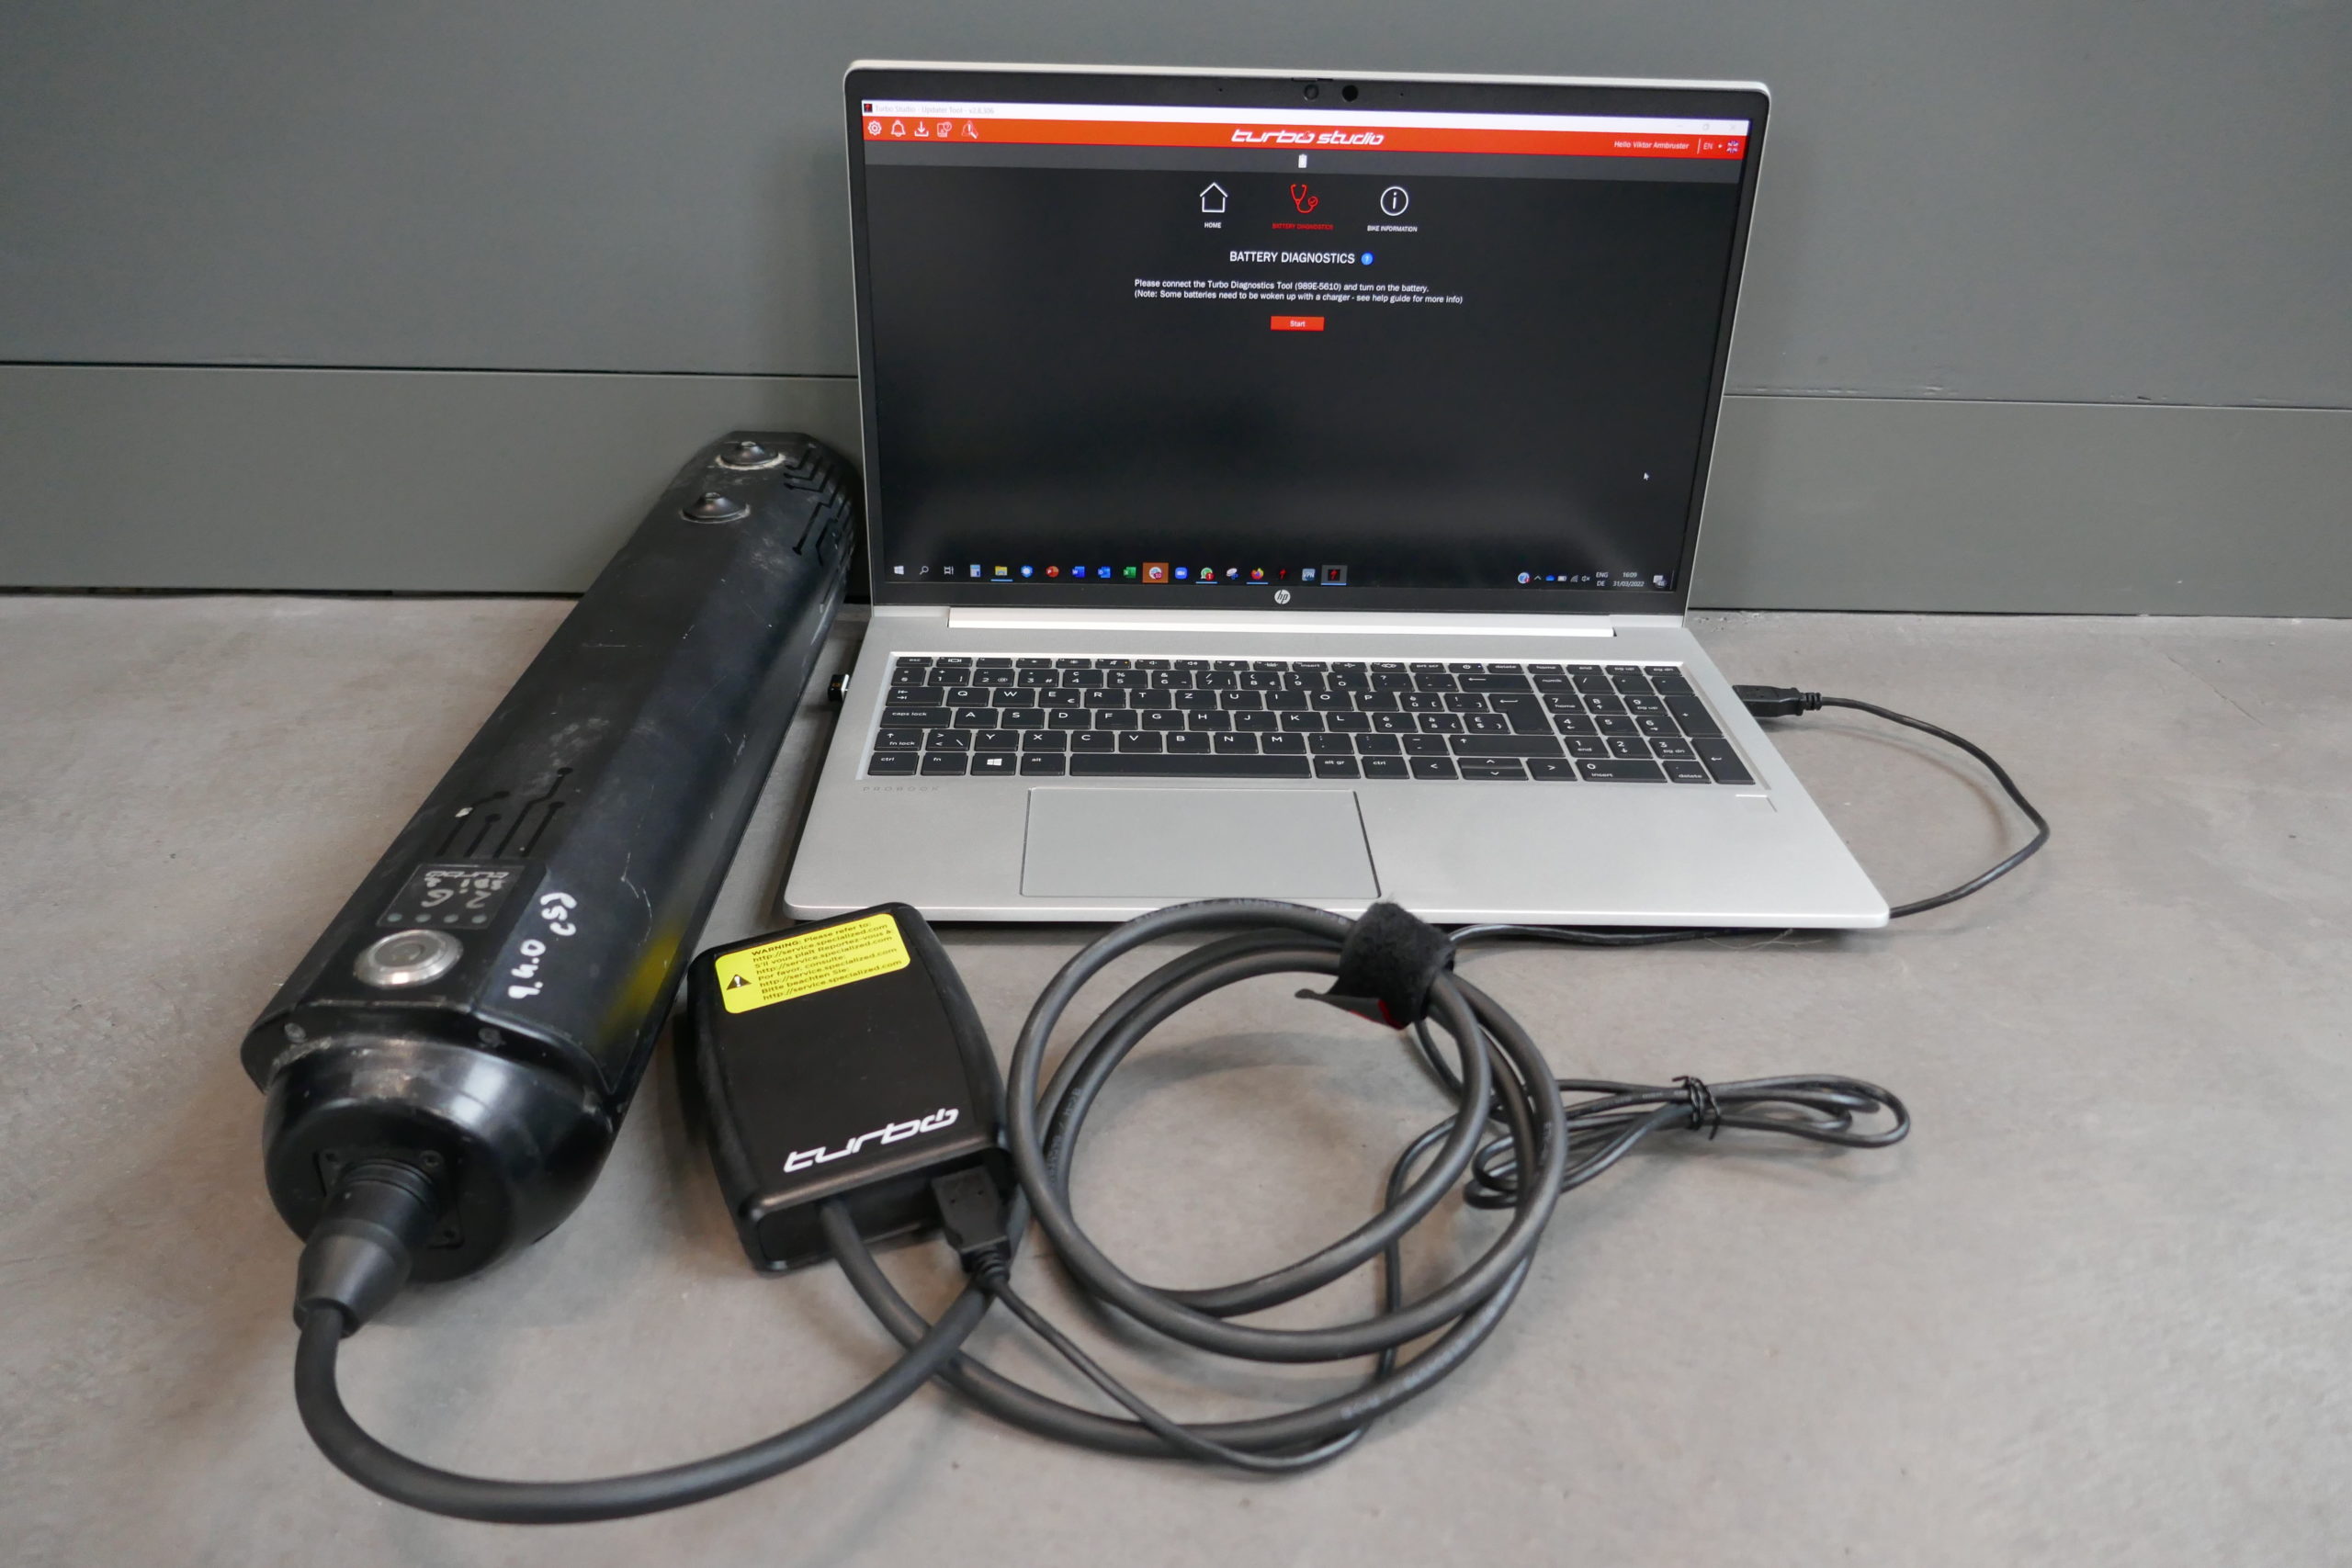
Turbo S/X/FLR (rear hub motor)
Battery can remained installed for diagnostics and connect directly to the Specialized Diagnostics Tool (989E-5610) at the Rosenberger connector. However, we recommend removing the battery for additional physical inspection (housing, connectors/ports, attached hardware).
Required Tools & Information
In order to diagnose the battery, have the following ready:
- All batteries: Specialized Diagnostic Tool (989E-5610)
- 3.1 Full Power batteries (introduced with Levo 4: 3.1 System Battery Diagnostic Adapter Cable, S256800001)
- SL Batteries only: SL Battery Diagnostic Adapter Cable (S216800010)
- WSBC serial number of the bike the battery is associated with
- Battery serial number for Levo/Kenevo Gen 1 and Vado/Como Gen 1
- The purchase date of the bike/battery you are diagnosing (if this is not available, use the purchase date unknown function)
Diagnostics Process (overview)
The diagnostics process will take a few minutes to complete. Once complete, the tool will let you know the status of the battery and any live events along with recommendations.
Battery stati:
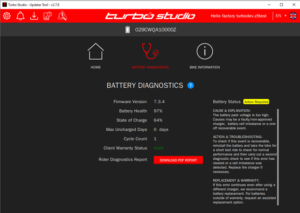
1. Healthy – Battery is operating normally
2. Action Required – Event normally recoverable and requires service/testing by retailer
3. Reduced Health – Battery suffers from an aged cell or cell imbalance; range or health may be reduced
4. Permanent Failure – Battery has entered permanent failure and should no longer be used or charged.
Battery Diagnostics Report
Once diagnostics are completed, Turbo Studio will create a downloadable PDF report, displaying the following:
Battery Status –
Battery Health –
Bike SN –
Battery SN –
Battery FW –
This report can be printed off and given to the rider as proof of diagnostics and the current state of the battery.
The battery diagnostics files can also be found under the tab ‘Battery Diagnostics’ within ‘Bike Information’.
Diagnostics Process (detailed)
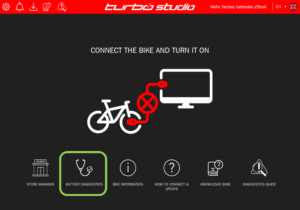
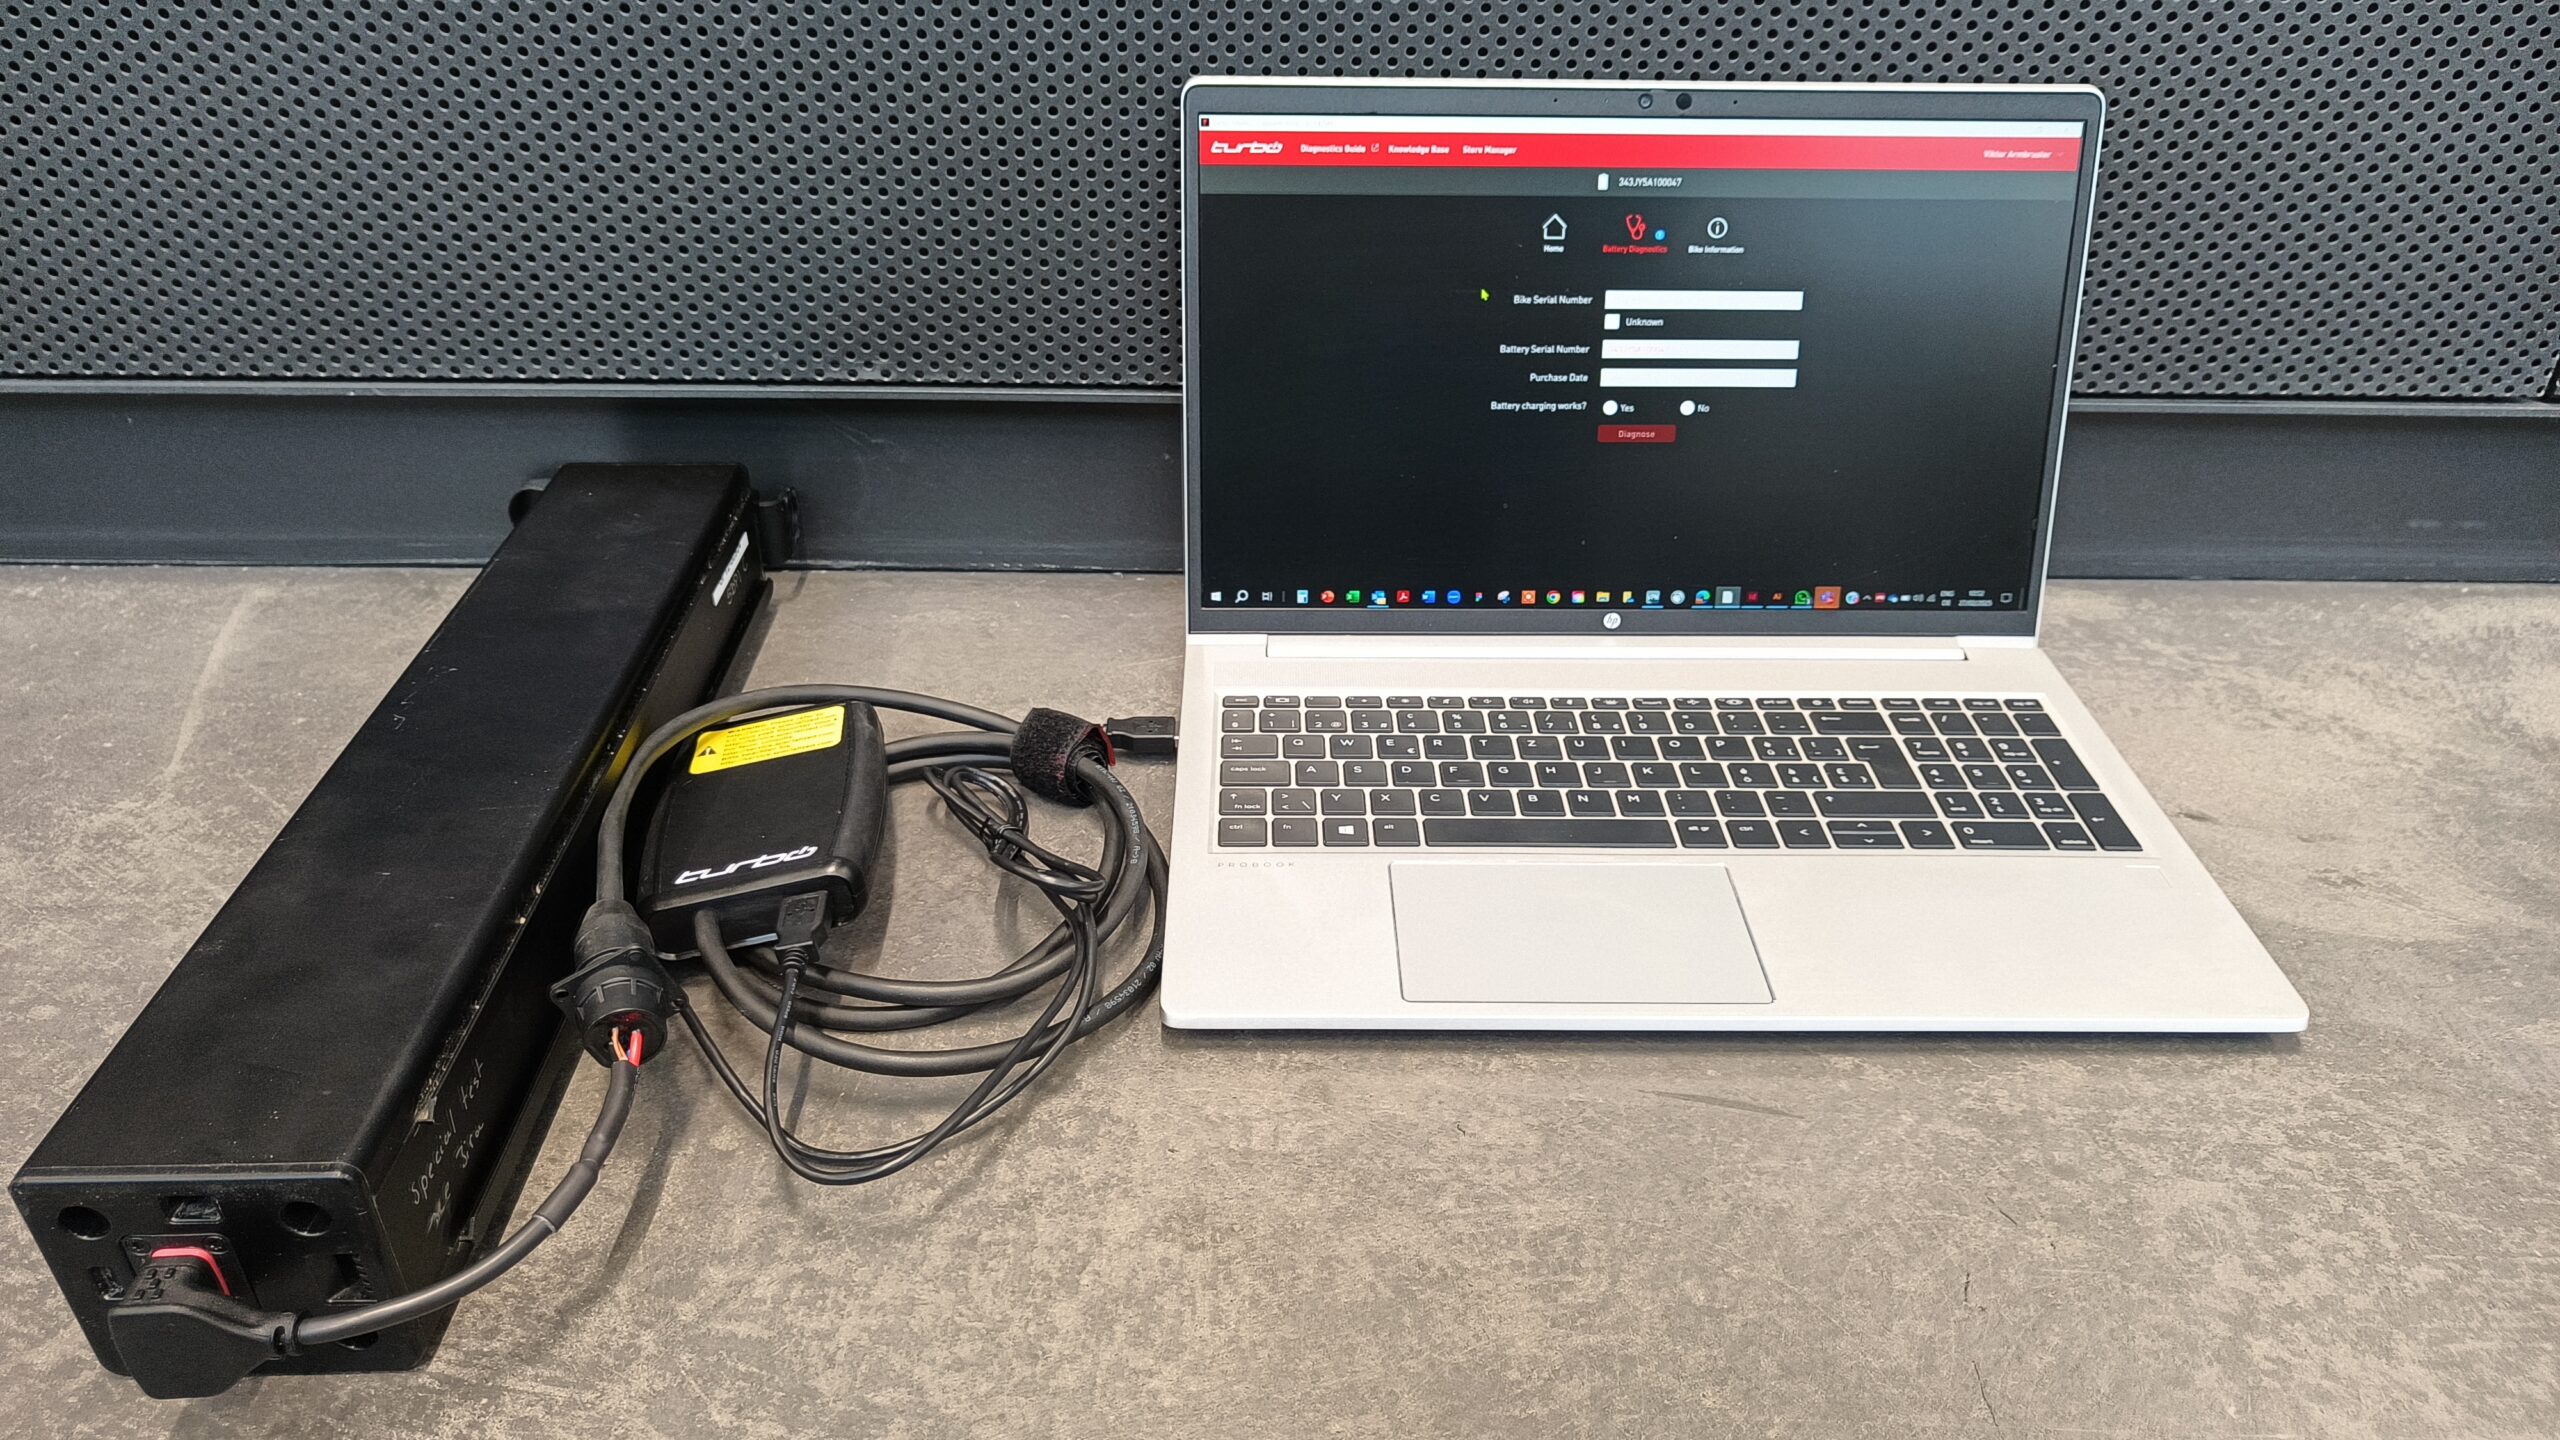
Home screen of Turbo Studio with battery diagnostics. You can enter into battery diagnostics when the diagnostic tool is connected or when a battery is connected.

Once a stand-alone battery is connected, the serial number entry will pop up and the bike serial number (WSBCxxxxxxxxxx) associated with the battery should be entered.
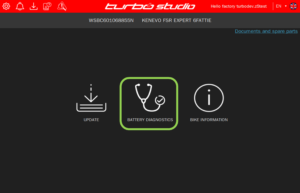
Once the serial number is entered, you will be able to select `Battery Diagnostics` from this menu.
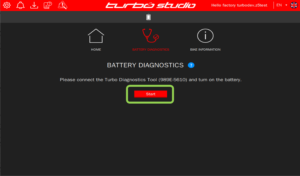
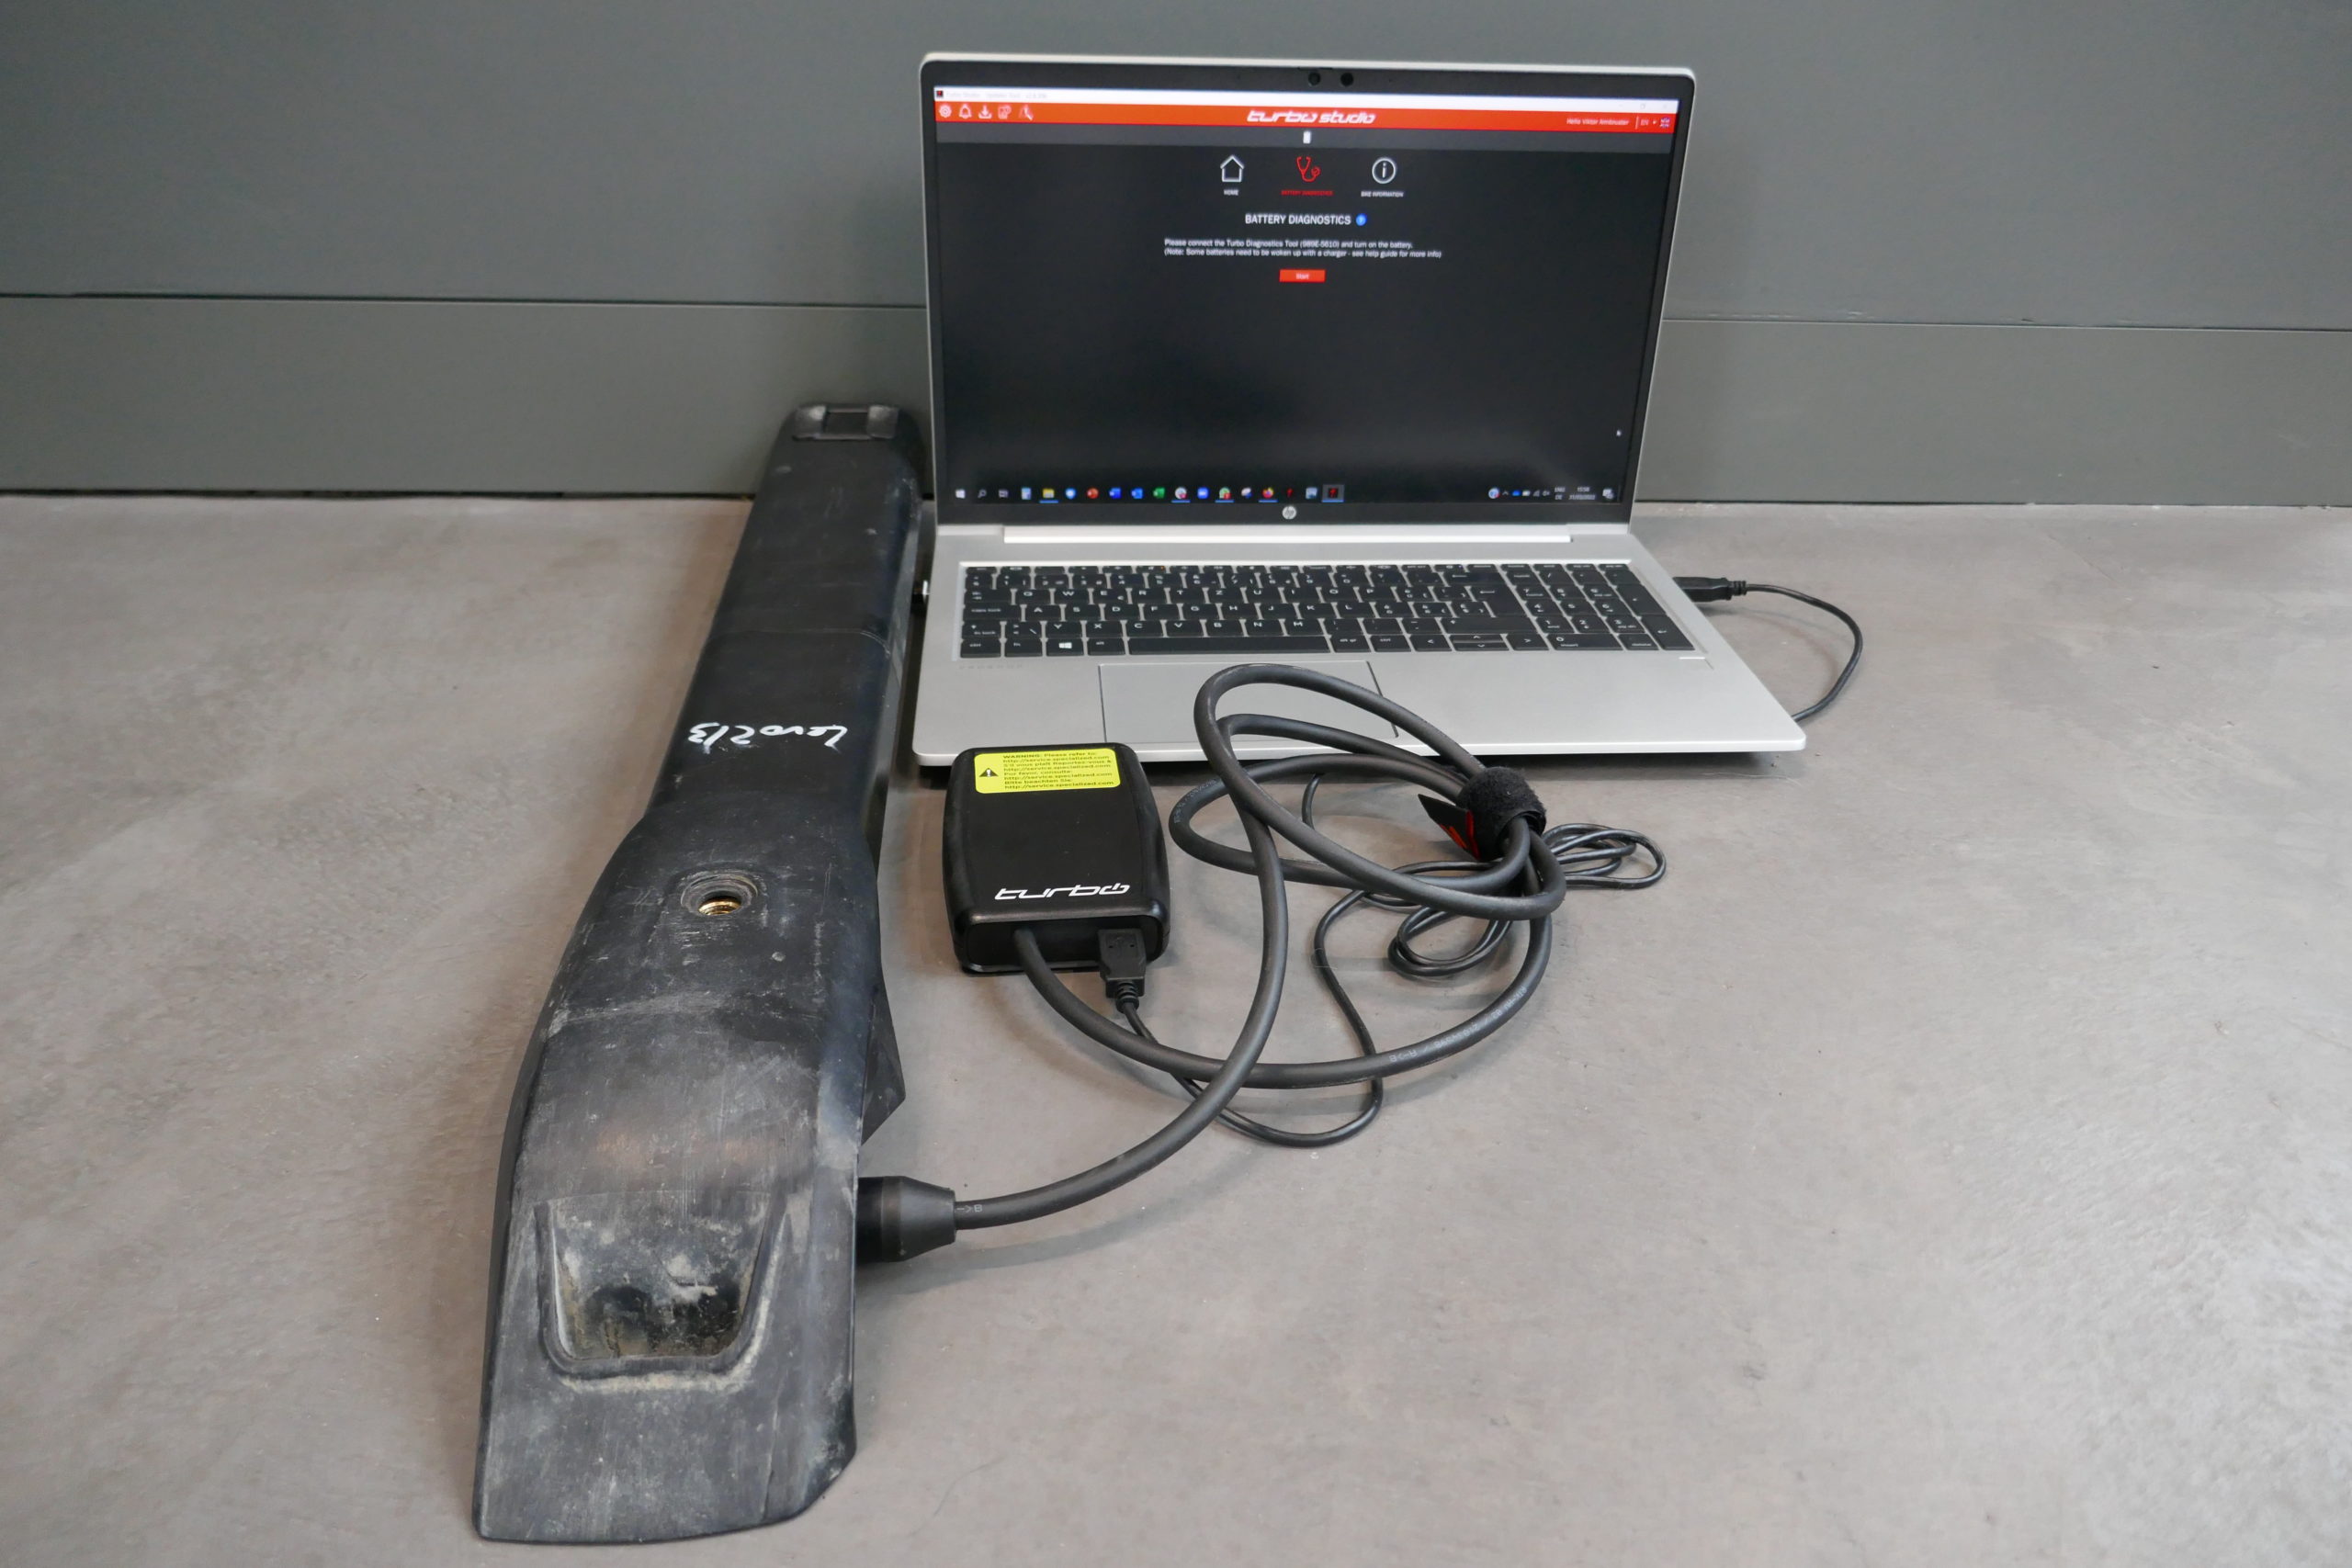
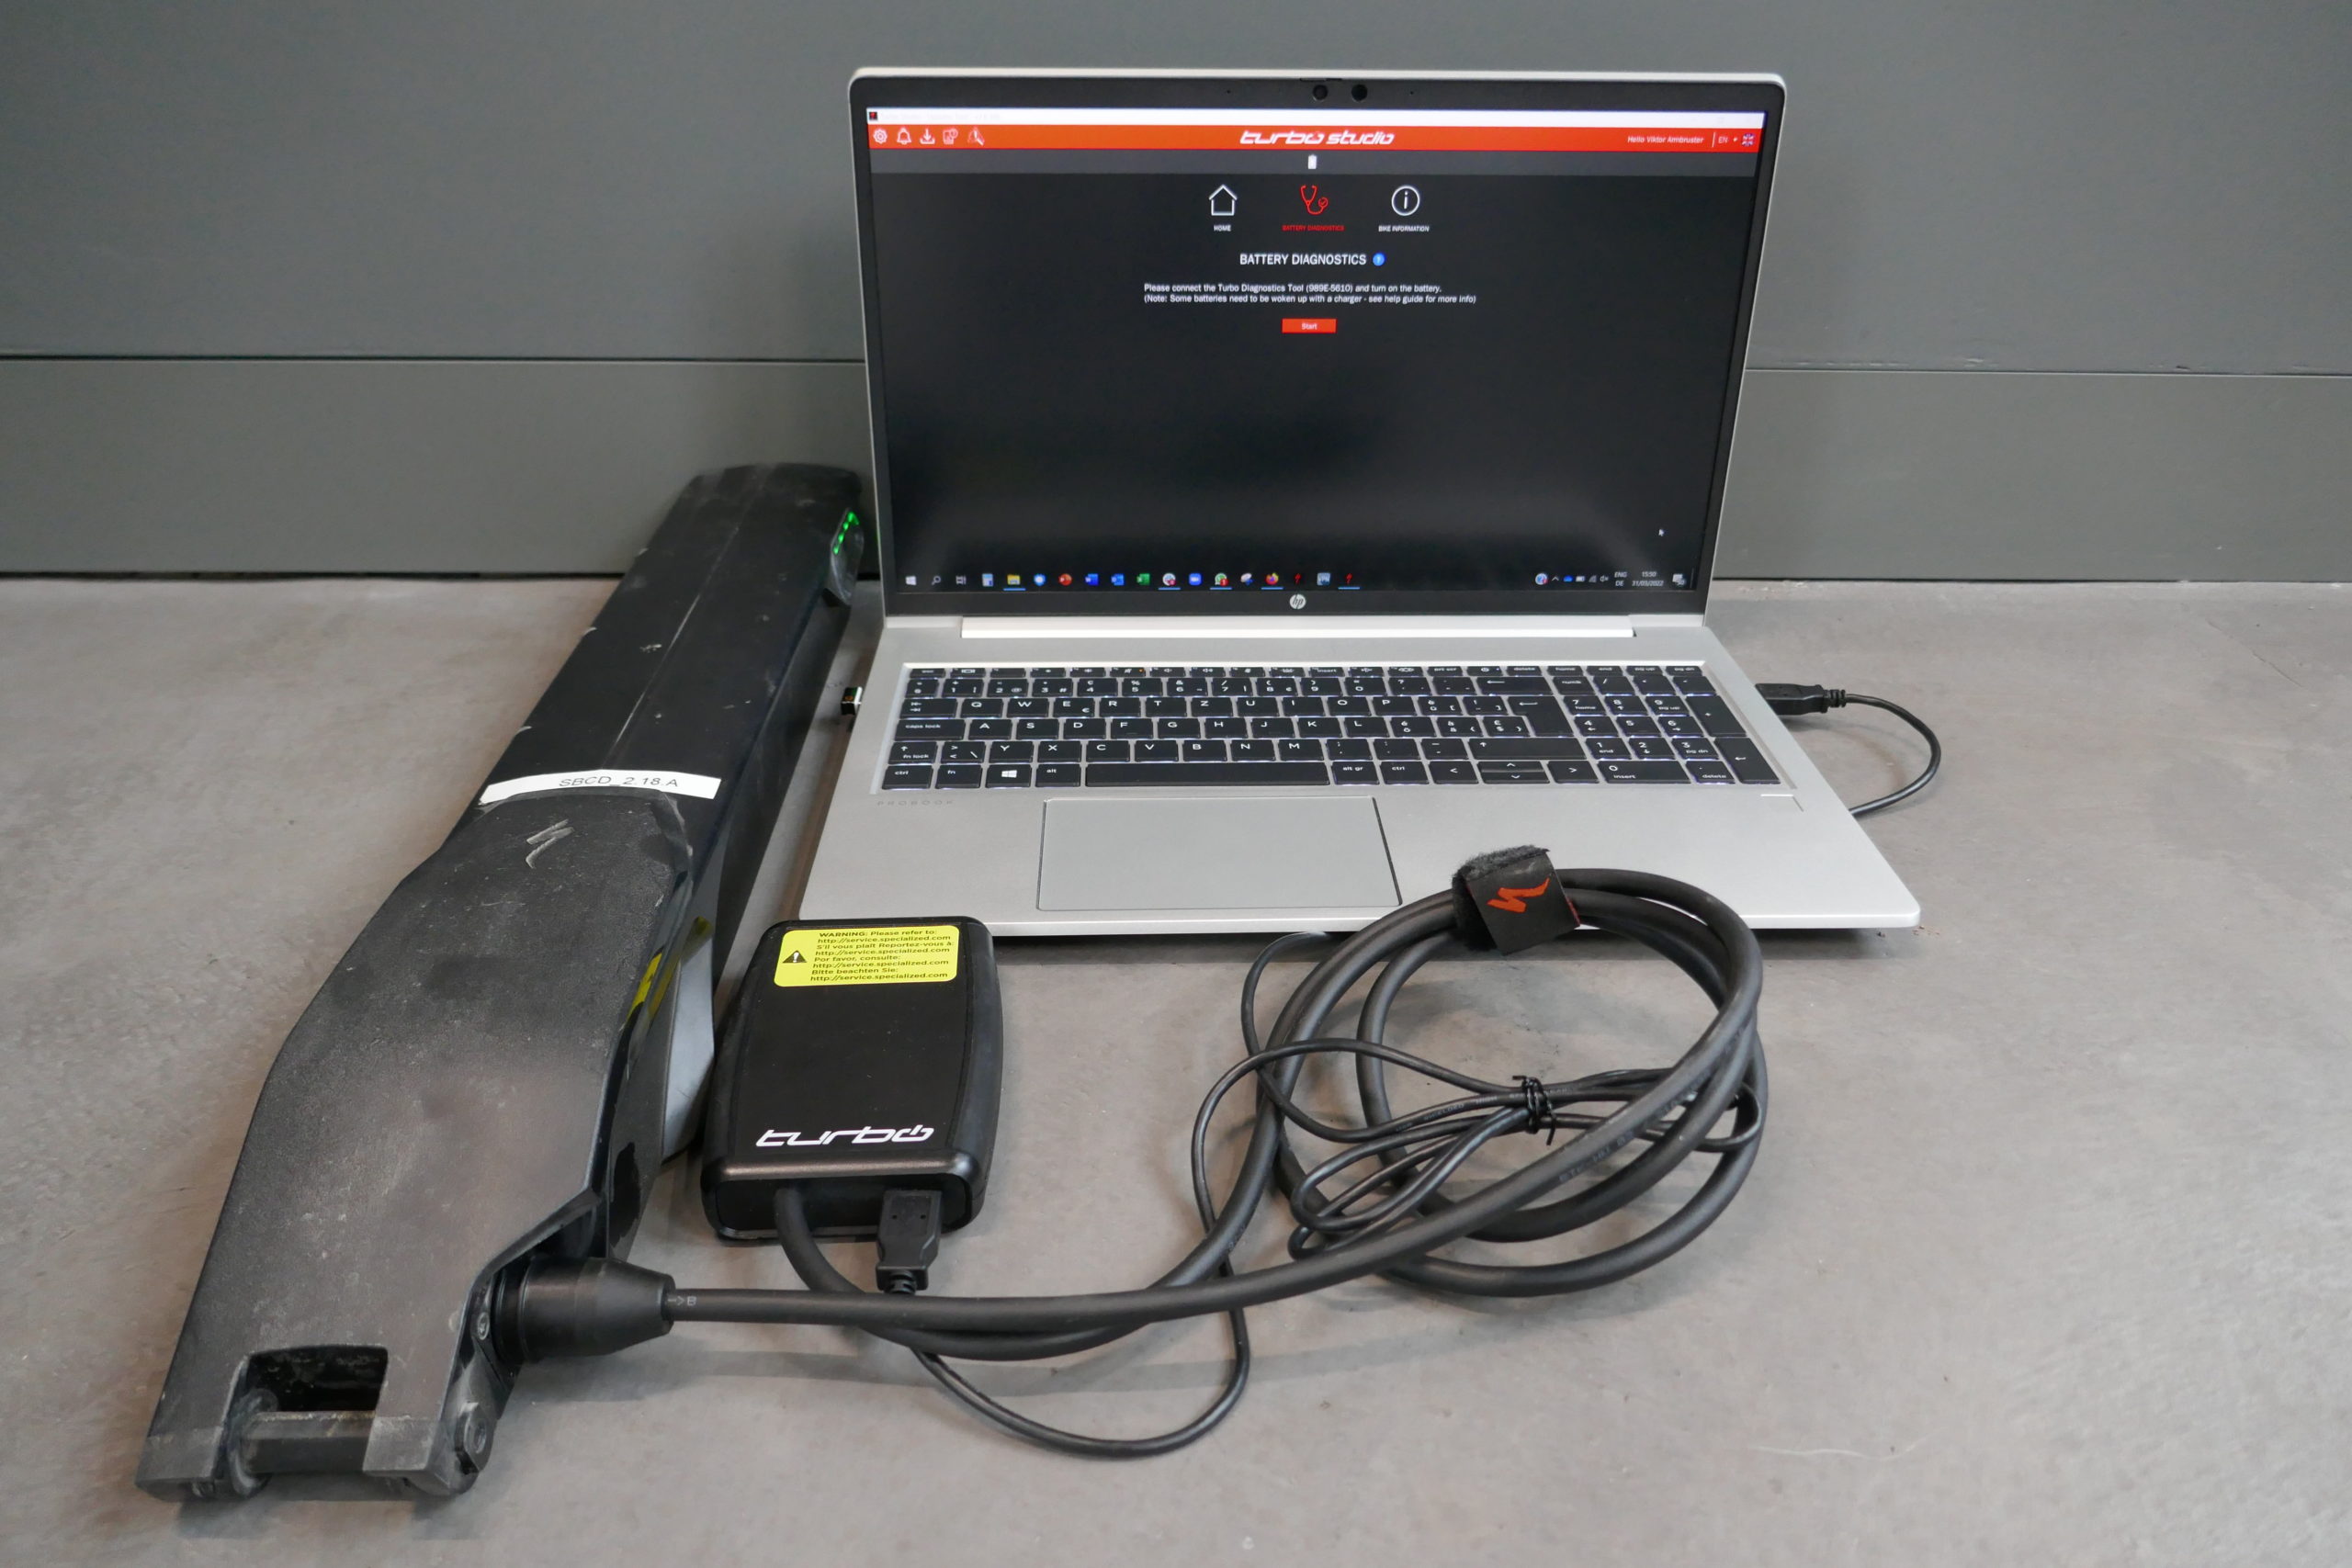
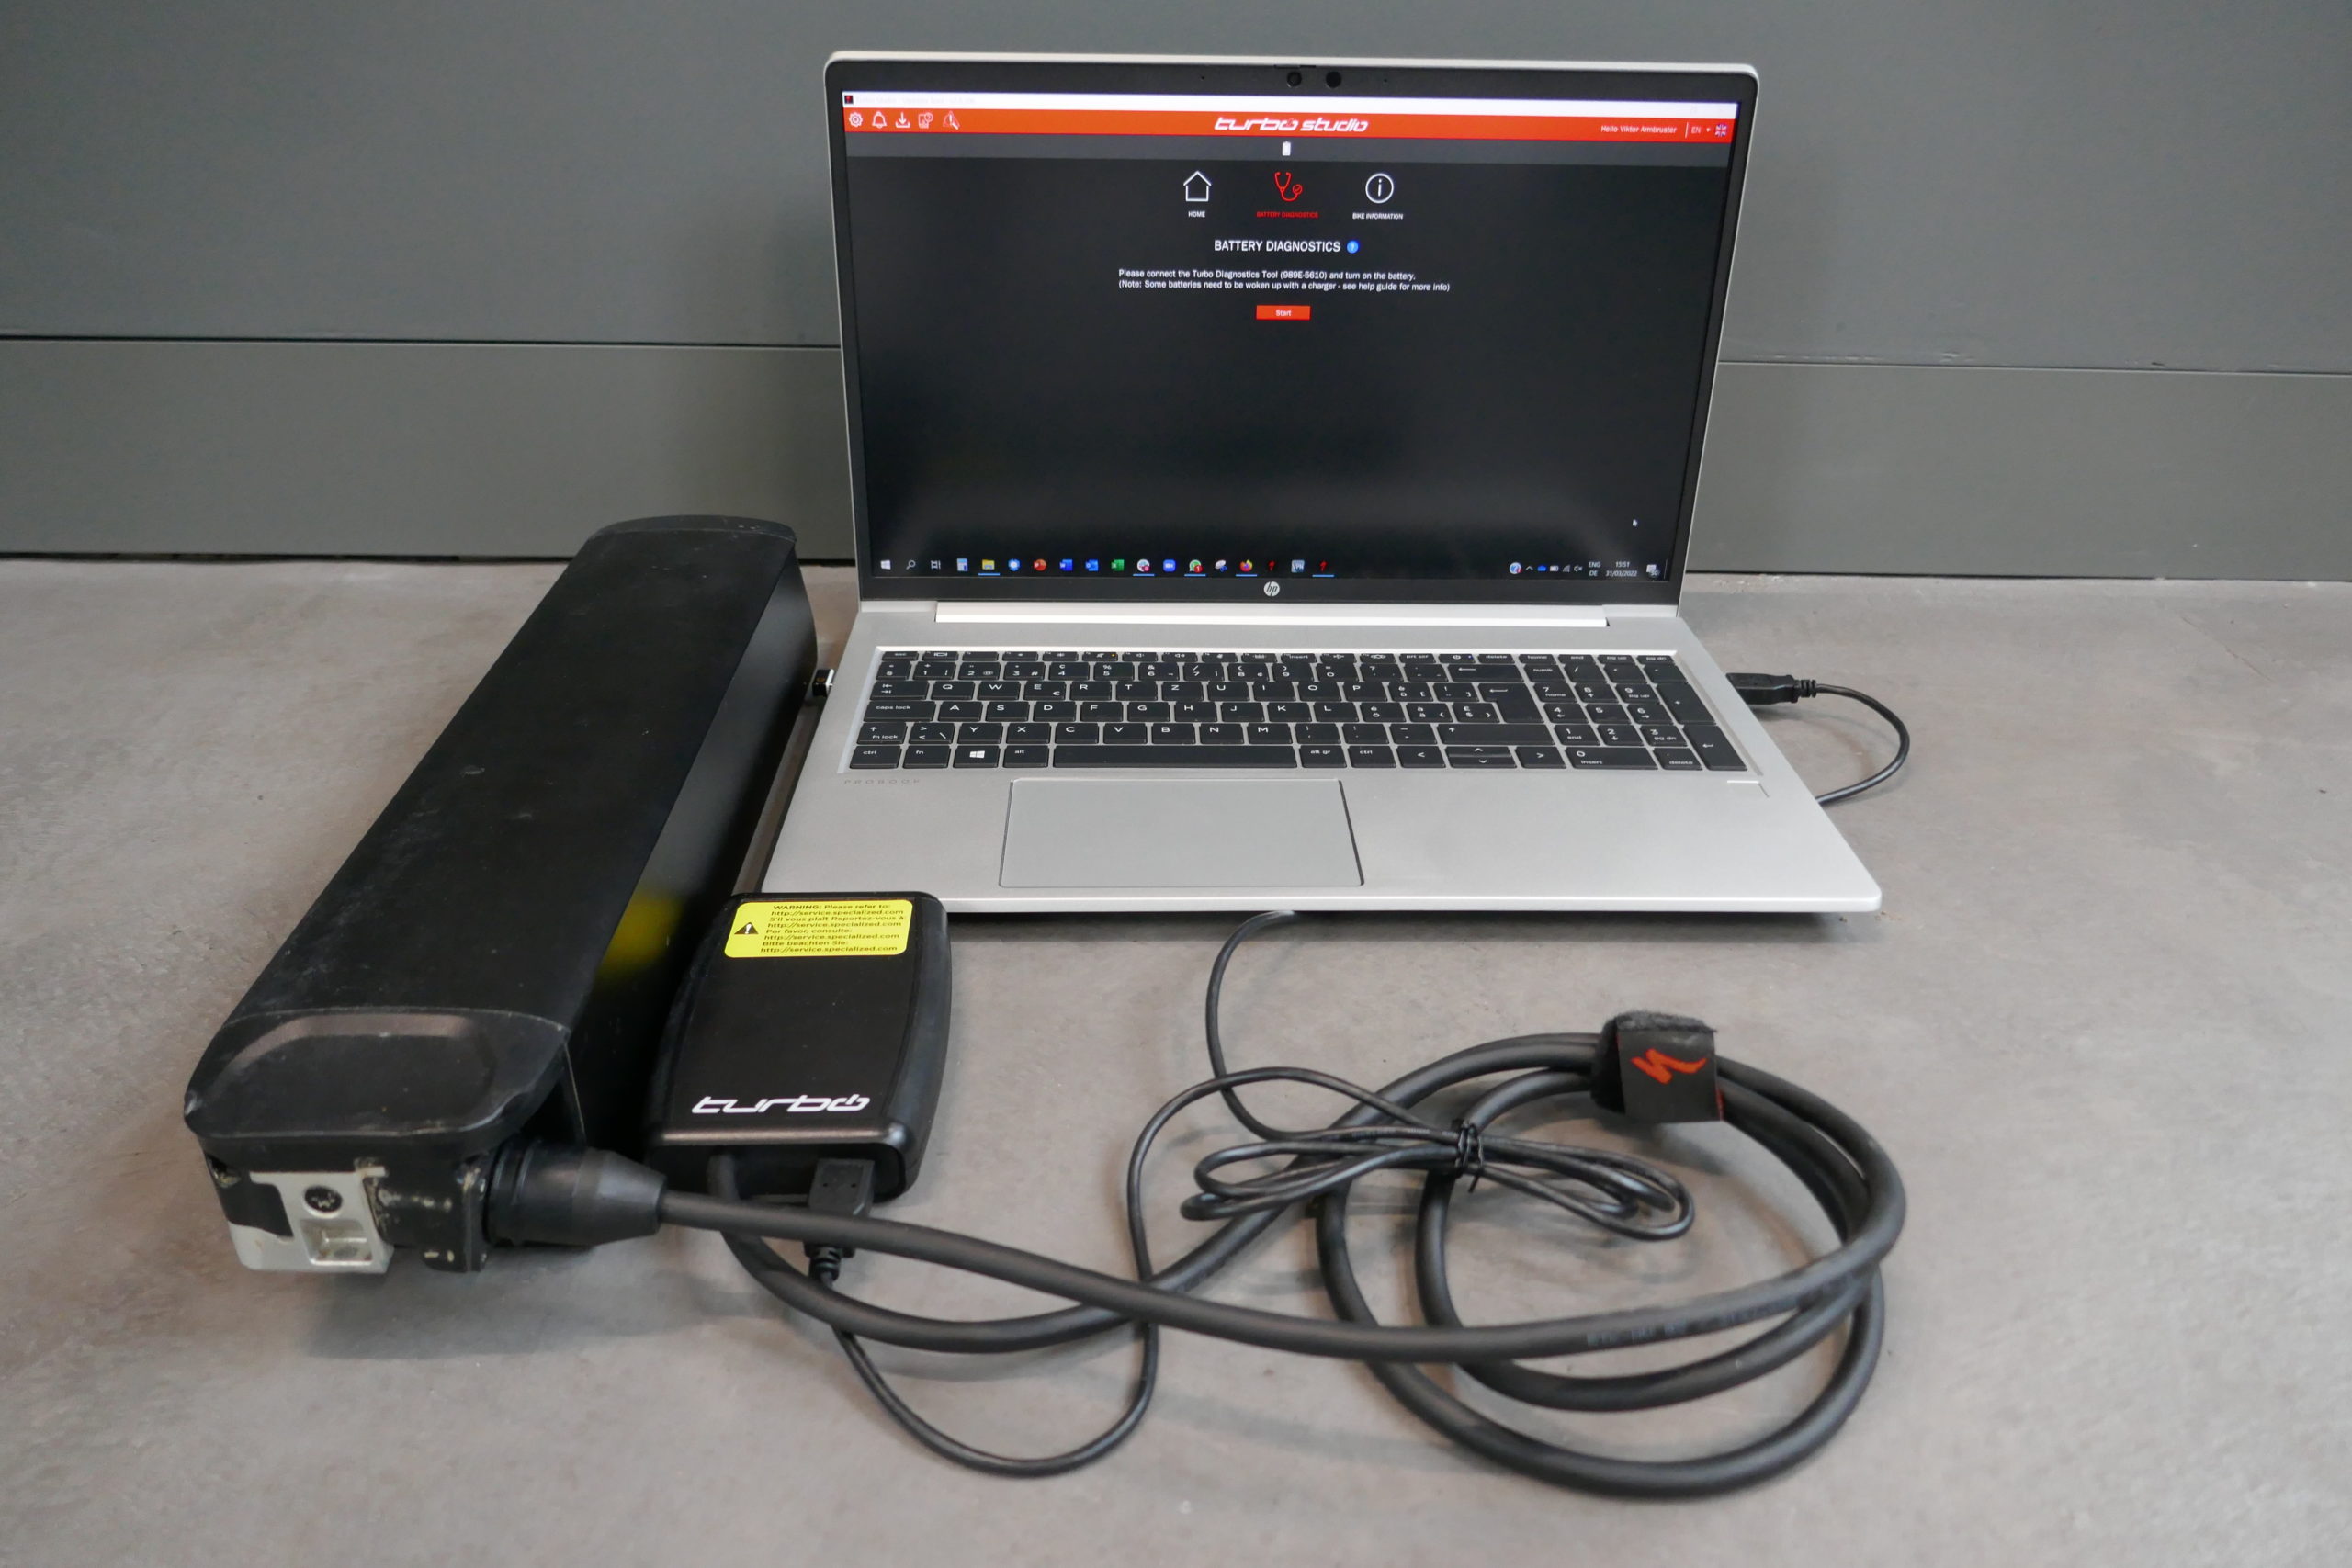
Once you enter the diagnostics screen, you will be asked to turn the battery on (if applicable) and a reminder of the required diagnostics tool shows.
After connecting, hit `Start` and the battery will start diagnosing.
Note for batteries without power button: in order to diagnose, they need to be woken up by connecting them to a charger for a few seconds.
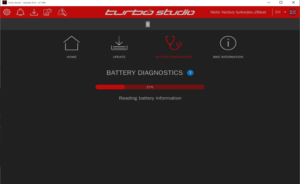
The battery is now being read by the diagnostics software.
This can take up to 30 seconds.
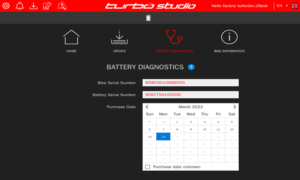
Once the battery information has been read, you will be asked to enter the battery serial number – please take care to not disturb the connection to the battery.
Then you will be asked to enter the purchase date of the battery, if known (store receipts or proof of purchase).
This helps Rider Care process warranty claims. If unknown, select `unknown`.
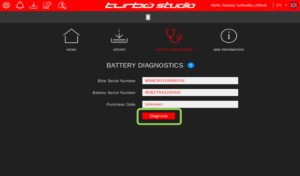
Once this information is entered, hit ´Diagnose` and the final diagnostics report will be created.
The battery status will be shown and files uploaded to our database.
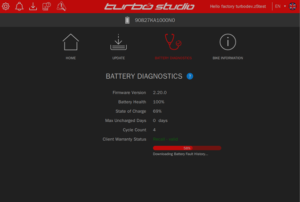
Diagnostics report being created and uploaded to our database.

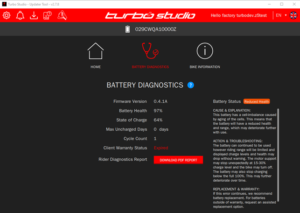
Diagnostics screen showing the battery status.
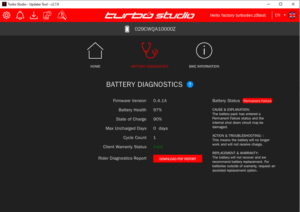
There are 4 battery statuses which can be displayed and service recommendations are given for all.
This screen shows an example of a `Healthy` battery status.
Note: not all services recommendations are the same, there are up to 20 different service recommendations.
A rider record of the battery diagnostics can be downloaded.
Example of ´Reduced Health` along with further information and actions.
A rider record of the battery diagnostics can be downloaded.
Example of ´Action Required`, where a battery may have a live or previous error which requires troubleshooting.
It is possible for a battery to be healthy again after troubleshooting.
A rider record of the battery diagnostics can be downloaded.
Example of permanent failure: the battery is no longer usable, and replacement is recommended.
A rider record of the battery diagnostics can be downloaded.

A rider record of the battery diagnostics can be provided to the rider.
The PDF record can be downloaded directly on the screen showing the battery status.
It also shows in Mission Control under `My Bikes` and ´Service Log`.
A rider record of the battery diagnostics can be provided to the rider.
The PDF record can be downloaded directly on the screen showing the battery status.
It also shows in Mission Control under `My Bikes` and ´Service Log`.
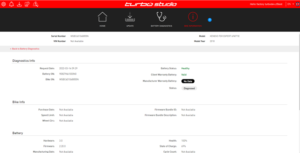
Diagnostics information for the battery and bike is available in `Bike Information`.
The battery diagnostics reports are also available.
These files are available for Rider Care and the claims team.
The files do not need to be included in a warranty claim. See further details in this communication.
Store Manager
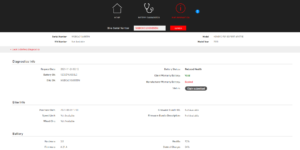
Retailers can now see the work that has been carried out in Turbo Studio such as Specialized services and diagnostics of batteries. This is a work-in-progress-feature that allows retailers to manage the work completed in their store and come back to it at a later date.
Retailers can see all Specialized services or procedures completed by a store account and all users included in this account.
Retailer can see all battery diagnostics completed by a store account and all users included in this account. This allows you to come back at a later date and process these claims as all the information is available to complete the claim.